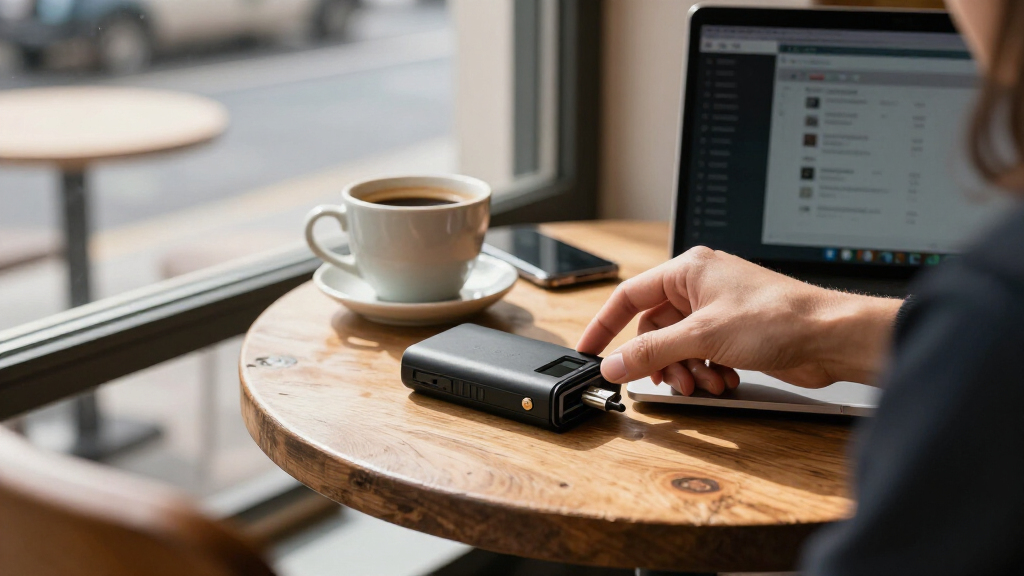

Set up a hardware wallet to hold the keys that control your cryptocurrency, then verify that a small transfer reaches an address the wallet confirms. This guide is for beginners who can use a smartphone or computer and want to move crypto off an exchange. Allow 30–60 minutes, plus extra time if a wallet update or network confirmation takes longer. Your recovery phrase is the key to restoring access: keep it private and offline throughout setup.

Get hardware and tech essentials delivered free — and shop member deals
- Fast, free delivery on millions of items
- Access to Prime Big Deal Days deals on October 6–7
- Prime Video, Amazon Music and more included

Trezor Safe 3 Crypto Hardware Wallet, Cosmic Black
- ✔ Model: TS3
- ✔ Security: EAL6+ secure element and passphrase protection
- ✔ Display: OLED

Tangem Crypto Wallet, Pack of 2
- ✔ Pack size: 2 cards
- ✔ Supported blockchains: 90+
- ✔ Supported assets: 14,100+ coins and tokens

DCENT Biometric Hardware Wallet with Bluetooth
- ✔ Security chip: EAL5+ certified Secure Element
- ✔ Authentication: Fingerprint
- ✔ Supported assets: 10,000+
Difficulty: Beginner | Time: 30–60 minutes
What You’ll Need
Tools & Materials:
- A hardware wallet from its manufacturer or an authorized seller
- A computer or phone compatible with the wallet
- The wallet maker’s official companion app, downloaded from its official website or verified app store listing
- The wallet’s supplied recovery phrase cards or another offline recording method approved by its maker
- A small amount of cryptocurrency to cover network fees and a test transfer
Knowledge:
- Basic ability to install an app and follow on-screen prompts
- The name of the cryptocurrency and network you plan to transfer
Check the manufacturer’s current setup instructions and supported assets before beginning. Use a private location, and do not set up the wallet while someone can see your screen or recovery phrase. Never enter your recovery phrase into a website, computer, phone, chat, or support form.
Trezor Safe 3 Crypto Hardware Wallet, Cosmic Black
Trezor Safe 3 is our most balanced choice for crypto storage because it pairs offline key management with an OLED screen for on-device confirmations. Reviewing transaction details on the wallet gives us a dedicated check before signing, rather than relying only on the phone or computer used to prepare the transaction. Its EAL6+ secure element and passphrase protection add security features that are directly relevant to a wallet intended for ongoing custody.The included two backup cards and multi-share backup support give recovery more structure than the product details provide for DCENT. Compared with Tangem’s two-card design, Trezor asks us to manage recovery materials and use a separate device with a screen; Tangem keeps the form factor simpler but makes a compatible NFC phone part of the routine. Trezor’s main tradeoff is its software-centered workflow: asset management uses Trezor Suite. Buyers who want card-style access or primarily phone-based use may prefer Tangem or DCENT, while users seeking a dedicated verification screen have a clear reason to choose Trezor.
Pros:
- EAL6+ secure element with passphrase protection
- OLED screen supports on-device transaction confirmations
- Supports thousands of coins and tokens
- Includes two backup cards and multi-share backup support
Cons:
- Asset management requires Trezor Suite
- Recovery materials and passphrase setup require careful handling
Best for: Buyers who want a dedicated screen for confirmations, passphrase protection, and included recovery materials for storing a varied crypto portfolio.
Not ideal for: People who want a card-sized wallet controlled directly by NFC or who prefer not to use Trezor Suite to manage assets.
Bottom line: Choose Trezor Safe 3 for a dedicated transaction-checking screen and well-defined recovery features in a conventional hardware wallet.
“Choose Trezor Safe 3 for a dedicated transaction-checking screen and well-defined recovery features in a conventional hardware wallet.”
Tangem Crypto Wallet, Pack of 2
Tangem makes storage feel more like carrying a secure card than setting up a small screen-equipped device. Its two-card pack provides a second card as an encrypted backup, which can be easier to understand than managing separate recovery cards and multi-share procedures. The product specifies an EAL6+ security certification, and its broad stated support—more than 90 blockchains and 14,100+ coins and tokens—makes it an appealing fit for people whose assets span networks.That convenience comes with a clear dependency: we need a compatible phone with NFC to access the wallet. Trezor Safe 3 offers a built-in display for transaction confirmation, while Tangem relies on the phone interaction and card format. Its cards are rated IP69K and described as waterproof and shockproof, adding physical resilience that the other listings do not specify. However, buyers who want an explicit seed phrase workflow may find Tangem’s optional setup less straightforward, and those wanting a built-in screen should look to Trezor or DCENT instead.
Pros:
- EAL6+ security certification for offline key storage
- Second card can serve as an encrypted backup
- Broad stated support across blockchains and digital assets
- IP69K water resistance and shockproof design
Cons:
- Requires a compatible phone with NFC
- Advanced users may prefer the optional seed phrase setup
Best for: Crypto holders who prefer a compact card form and want a second card available as an encrypted backup.
Not ideal for: Buyers without an NFC-compatible phone or those who specifically want a built-in screen or an explicit seed phrase recovery routine.
Bottom line: Tangem is a strong fit when a card form and paired-card backup matter more than a built-in transaction display.
“Tangem is a strong fit when a card form and paired-card backup matter more than a built-in transaction display.”
DCENT Biometric Hardware Wallet with Bluetooth
DCENT is the most mobile-oriented pick in this group, combining Bluetooth access through its app with fingerprint authentication and a built-in screen. It stores keys offline in an EAL5+ certified secure element and supports more than 10,000 assets across over 100 blockchains, according to the supplied product details. For buyers who move between storage and dApps, MetaMask connectivity adds a path to browser-based services without making DCENT’s workflow identical to Trezor Suite or Tangem’s NFC card access.Its strongest distinction is the emphasis on active use: the fingerprint reader simplifies access, while the screen lets us review transactions before signing. Blockaid-powered contract checks are also intended to warn about risky contracts. These features may matter more to an app-connected user than Tangem’s tougher card construction or Trezor’s EAL6+ certification and backup materials. The tradeoffs are meaningful for a storage-first buyer: DCENT specifies EAL5+, and the phone experience depends on its mobile app. The product information also leaves battery life and device dimensions unspecified, so buyers prioritizing predictable charging or pocket fit have less to go on.
Pros:
- Offline key storage in an EAL5+ certified secure element
- Fingerprint authentication for device access
- Built-in screen and controls support transaction review
- Bluetooth app use, MetaMask connectivity, and contract checks
Cons:
- Bluetooth phone use requires the DCENT mobile app
- Battery life and device dimensions are not specified
Best for: Mobile crypto users who want fingerprint access, a screen for transaction review, and routes to MetaMask-connected dApps.
Not ideal for: Long-term holders who prioritize the highest stated certification in this lineup, or buyers who want clear battery and dimension details before choosing.
Bottom line: Choose DCENT when mobile access and dApp interaction are central, while recognizing that its listed certification is EAL5+ and its phone workflow depends on the DCENT app.
“Choose DCENT when mobile access and dApp interaction are central, while recognizing that its listed certification is EAL5+ and its phone workflow depends on the DCENT app.”
As an Amazon Associate we earn from qualifying purchases.
Before You Start
Buy the device from the manufacturer or an authorized seller. If the package looks opened, the device arrives with a recovery phrase already written down, or setup instructions ask you to use a supplied phrase, stop and contact the manufacturer through its official support channel. A legitimate wallet generates a new phrase during your setup.
Crypto transfers are generally irreversible. Confirm the exact asset, network, and receiving address before sending funds. A wallet protects the private keys on the device; it does not protect against sharing the recovery phrase, fake apps, phishing, or sending funds on the wrong network.
Step-by-Step Instructions
Step 1: Get the official wallet app
Open the wallet maker’s official website by typing its known address yourself, or find its verified app store listing. Download the companion app and check that the publisher matches the manufacturer. Avoid sponsored search links, links in unsolicited messages, and apps sent by another person.
Tip:If the manufacturer provides a way to verify app downloads or device authenticity, follow its current instructions.
Check: The app opens and identifies the wallet model you own, and you obtained it from a source you verified.
Step 2: Connect and initialize the device
Charge or connect the hardware wallet as its instructions specify. Open the official companion app, connect the device, and choose the option to create a new wallet. Follow the prompts on the device itself to set a PIN or other device lock. Read each prompt on the device screen before approving it.
Tip:Do not initialize the device with a recovery phrase that came in the box or from a seller. If the device already appears configured, stop and contact the maker.
Check: The device displays setup prompts and asks you to record a newly generated recovery phrase.
Step 3: Record and verify the recovery phrase
Write each recovery word in the exact order displayed by the device, using the supplied card or another offline method the manufacturer supports. Check spelling and sequence as you write. Complete any word-order quiz on the device or in the app. Store the phrase somewhere private and protected from fire, water, theft, and casual discovery.
Tip:Never photograph, scan, email, message, or save the phrase in a cloud account or password manager. Anyone who obtains it may be able to take the funds, even without the device or PIN.
Check: You can complete the device’s phrase check from your offline record, and the record is not stored digitally or visible to others.
Step 4: Set up a recovery safeguard
Read the manufacturer’s instructions for replacing a lost or damaged device with your recovery phrase. Consider making a second offline copy and storing it separately if you can protect both copies from theft and damage. Do not share the phrase with a trusted contact as a convenience; arrange access only through a plan that keeps the words secret and secure.
Tip:Some wallets support optional passphrases or other advanced recovery settings. These can make recovery harder if forgotten. Use them only if you understand how they work and can preserve the exact recovery details safely.
Check: You know where the recovery record is, how to retrieve it if the device fails, and who can access it.
Step 5: Add the cryptocurrency account
In the official app, select the asset you intend to store and add its account. Confirm that the app and wallet support both the asset and its network. Use the device screen to approve the account setup or address display when prompted; do not approve prompts you did not initiate.
Tip:A token may use a network different from the one its name suggests. Check the sender’s withdrawal options and the wallet’s supported networks before choosing.
Check: The app shows the intended asset account and a receiving address that the wallet can display for confirmation.
Step 6: Verify the receiving address
Choose Receive in the app and select the correct asset and network. Ask the hardware wallet to show or verify the address on its own screen. Compare the full address on the device with the address shown by the app or the source exchange. Copy the address only after the device confirms it.
Tip:Malware can replace a copied address. Check the address on the hardware wallet display, and never rely only on the computer or phone screen.
Check: The address on the hardware wallet matches the receiving address you plan to give the sender.
Step 7: Send a small test transfer
At the exchange or wallet holding your funds, choose Withdraw or Send. Select the same asset and network shown in your hardware wallet, paste the verified receiving address, and review the fee and destination. Send a small amount that you can afford to lose if something goes wrong. Wait for the network to confirm the transfer.
Tip:Some networks require a minimum withdrawal or have high fees. Check the minimum and fee before sending; do not switch networks just to reduce the cost.
Check: The test transfer appears in the hardware wallet app after the required network confirmations, and the amount and asset are correct.
Step 8: Transfer the remaining funds and secure the device
After the test succeeds, repeat the withdrawal steps for the remaining amount, checking the asset, network, address, and fee again before confirming. Store the device and recovery phrase separately in secure locations. Lock the device when not in use, keep its firmware and companion app current through official channels, and verify important transactions on the device screen.
Tip:For a large balance, consider sending funds in more than one transfer if the network and fees make that practical. Keep enough cryptocurrency available to pay future network fees.
Check: The wallet app shows the expected balance after confirmations, the hardware wallet controls the account, and the recovery phrase remains private and offline.
Common Mistakes to Avoid
- Recording the recovery phrase in a photo, note app, cloud drive, or message. — Write it offline and store it in a private, protected location. Treat anyone asking for the phrase as untrusted, including someone claiming to be support.
- Sending funds to an address that was not checked on the hardware wallet display. — Verify the full address on the device screen immediately before sending, especially after copying and pasting.
- Choosing the wrong network for an asset or token. — Match the wallet’s supported receiving network to the sender’s withdrawal network. Confirm compatibility before initiating a transfer.
- Moving the full balance before testing the setup. — Send a small test amount first and wait until it appears in the wallet before transferring the rest.
Troubleshooting
Problem: The companion app does not recognize the hardware wallet.
Solution: Check the device’s connection, battery, cable, and compatibility. Close and reopen the official app, then follow the manufacturer’s connection or firmware instructions. Download updates only through official channels.
Problem: The test transfer has not appeared.
Solution: Check the transaction status and transaction ID at the sender and on the relevant network’s official or widely trusted block explorer. Confirm the destination address and network. Some transfers need more confirmations; contact the sender’s support if the transaction remains pending or failed.
Problem: The wallet app and device show different receiving addresses.
Solution: Do not send funds. Use the address displayed and approved on the hardware wallet, and check for app or device updates using the maker’s official instructions. If they still disagree, contact official support without revealing the recovery phrase.
Problem: The recovery phrase check fails or a written word seems incorrect.
Solution: Use the device’s recovery check prompts and compare each word and its position with your offline record. Do not guess, share the phrase, or enter it on a website. If the phrase cannot be verified, follow the manufacturer’s official recovery guidance before depositing funds.
What Success Looks Like
The hardware wallet was initialized by you, its recovery phrase was generated during setup and recorded offline, and you verified the receiving address on the device screen. A small test transfer arrived on the correct network, followed by the remaining funds if applicable. The device shows the expected account and balance after confirmation, and no one else has seen or received the recovery phrase.
Next Steps
Keep the wallet and recovery phrase in secure, separate places, and check the manufacturer’s instructions periodically for supported firmware and security updates. Before each future transfer, verify the asset, network, destination address on the device, and fee. If you plan to restore the wallet on a replacement device, use the manufacturer’s official instructions and enter the phrase only on the trusted hardware wallet or recovery method it specifies.
Frequently Asked Questions
Can I recover my crypto if the hardware wallet is lost or broken?
Usually, you can restore access with the recovery phrase on a compatible replacement wallet. Follow the manufacturer’s recovery instructions, and never enter the phrase into a website or a device you do not trust. Without the phrase, access may be permanently lost.
Does a hardware wallet store my coins?
The cryptocurrency remains recorded on its blockchain. The wallet protects the private keys that let you authorize transactions. The device helps keep those keys offline and requires your approval for actions.
Should I transfer all my crypto from an exchange?
That depends on how you use your funds and your ability to secure the device and recovery phrase. Self-custody gives you control over the keys and responsibility for protecting them. Start with a test transfer, and keep funds on an exchange only if you accept the exchange’s custody and account risks.
What should I do if someone asks for my recovery phrase?
Do not provide it. A legitimate wallet manufacturer or support representative should not need your recovery phrase. Stop the conversation and contact support through the official website or app.
Fall Picks
fall essentials
As an affiliate, we earn on qualifying purchases.