To select resistance band tension without guesswork, assess your fitness goals and current strength. Use color codes or perform gentle stretch tests to gauge appropriate resistance—lighter bands for rehabilitation or beginners, heavier for building strength. Adjust tension by changing grip or doubling bands as you progress. Remember, matching tension to your workout type ensures effectiveness. For a deeper understanding and expert tips, explore further to find the best fit for your routine.
Key Takeaways
- Use visual stretch tests to gauge the band’s elongation and feel for appropriate resistance.
- Match band color coding (e.g., red, blue, black) to your strength level and workout goals.
- Consider your fitness stage: lighter bands for beginners, heavier for advanced strength training.
- Adjust tension by changing grip, doubling bands, or selecting different lengths and thicknesses.
- Regularly test and evaluate tension during workouts to ensure optimal resistance and progression.
What Are Resistance Band Tension Levels and Why They Matter

Understanding resistance band tension levels is crucial because they directly affect the workout’s intensity and effectiveness. Band elasticity determines how much resistance you feel during exercises, with more elastic bands providing greater tension as you stretch them. Tension consistency ensures that the resistance remains steady throughout each movement, allowing for smooth, controlled workouts. If a band’s elasticity varies or if tension fluctuates, your muscles won’t work evenly, reducing effectiveness and increasing injury risk. Choosing the right tension level means selecting a band that offers appropriate resistance for your strength and goals, while maintaining consistent tension helps you perform each movement safely and efficiently. Additionally, tension levels can be tailored to match your fitness progression, making your workouts more adaptable and personalized. Understanding how elasticity impacts resistance allows you to select bands that align with your specific training needs. Recognizing the role of contrast ratio in visual clarity can help you see progress in your exercises more clearly, especially when monitoring form. Being aware of resistance variability ensures you select bands that provide stable resistance throughout your workout, which is essential for preventing injury and maximizing gains. By understanding these factors, you can better tailor your workouts for optimal results.
Assess Your Fitness Goals to Pick the Right Resistance Band Tension

To choose the right resistance band tension, you need to clearly define your fitness goals. Your goals determine the tension level that suits you best. For example, if you’re aiming for light resistance to improve flexibility, select lower tension bands. If building strength is your focus, higher tension bands are more appropriate. Consider these key points:
- Identify whether you want to enhance muscle endurance or increase strength.
- Use band color coding to match tension levels—lighter colors for lower tension, darker for higher.
- Explore band material options, like latex or fabric, which influence durability and grip during workouts.
- Keep in mind that Free Floating training techniques can help you engage muscles more effectively with resistance bands. Additionally, understanding support for different exercises can improve your overall workout effectiveness and safety.
- Remember that training techniques such as proper form and controlled movements are essential for maximizing results and avoiding injury.
Matching your goals with the appropriate tension ensures effective training and prevents injury. Always check the band’s color coding and material to select the best fit for your specific needs.
How to Test Resistance Bands and Find Your Ideal Tension
To find the right tension, start with a visual band stretch test by gently pulling the band to see how much it stretches. You can also measure the tension with controlled movements to make sure it matches your strength level. These methods help you select a resistance band that challenges you without risking injury. Additionally, considering your experience with performance and versatility can guide you toward choosing a band that aligns with your fitness goals and ensures safe, effective workouts. For optimal results, understanding the science behind resistance training can help you select the appropriate tension levels for different exercises. Recognizing the cultural significance of symbols related to strength can also motivate you during your fitness journey by connecting physical effort to a broader sense of resilience. Incorporating smart fitness technology such as connected resistance bands can provide real-time feedback and enhance your training accuracy. Furthermore, assessing the material and durability of resistance bands ensures they can withstand regular use without snapping or losing elasticity.
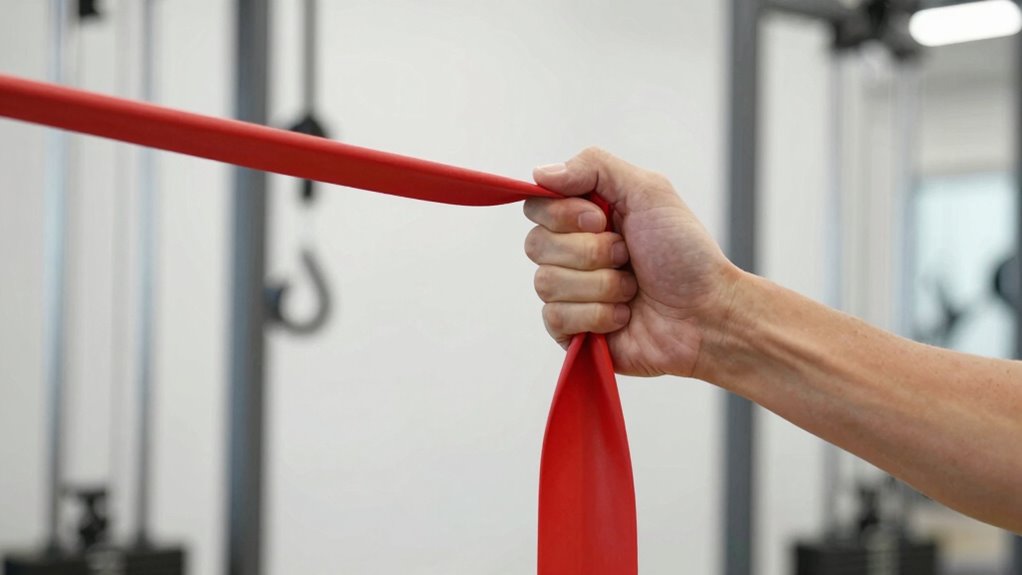
Visual Band Stretch Test
Performing a visual band stretch test is a simple way to determine if your resistance band provides the right level of tension for your workout. Start by examining the band’s color coding, which often indicates tension levels, but remember that tension consistency varies between brands. Next, stretch the band slowly and observe how much it elongates:
- If it stretches easily and feels too loose, choose a thicker or darker-colored band.
- If it barely stretches or feels too tight, opt for a lighter or differently colored band.
- Look for even tension and consistent stretch without signs of wear or thinning, which could affect performance.
- Be aware that media literacy can help you interpret product labels and reviews more effectively.
- Understanding product quality and construction can also guide your choice and ensure durability over time.
- Recognizing material properties such as elasticity and resistance helps in selecting bands that match your strength level and workout goals.
- Additionally, considering brand reputation can provide insights into the reliability and safety of the resistance bands you choose.
This visual check helps you quickly identify whether your band matches your strength level and ensures safe, effective workouts without guesswork.
Controlled Tension Measurement
After visually evaluating your resistance band, the next step is to measure its tension accurately to guarantee it matches your strength level. By testing the band’s actual resistance, you avoid guesswork and ensure safety. Choose a sturdy surface, hold the band firmly, and stretch it to a specific length. Feel how the band material responds—whether it’s elastic or stiff—and note the tension. Use the color coding as a guide, but verify with your own measurement. For example:
| Band Color | Estimated Resistance |
|---|---|
| Light Green | Light to moderate |
| Red | Moderate to heavy |
| Blue | Heavy resistance |
| Black | Extra heavy |
This process helps you select the perfect tension, matching your goals precisely. Incorporating proper testing techniques and understanding the resistance measurement process can further enhance your ability to choose the right resistance level confidently.
Matching Resistance Band Tension to Your Workout Type and Experience

Choosing the right resistance band depends on your fitness level and workout goals. If you’re a beginner, lighter bands help build strength gradually, while seasoned athletes might need higher tension for challenge. Selecting bands that match your specific workout type guarantees you get the most effective and safe training experience. Additionally, understanding safe use practices ensures you prevent injuries and maximize benefits during your workouts. For example, knowing how resistance levels correspond to different exercises can significantly enhance your training efficiency and safety. Incorporating knowledge of performance ratings of various resistance bands can help you identify those with optimal durability and user satisfaction for your needs. Moreover, considering body piercing materials and jewelry fit can inspire you to stay healthy and energized during your fitness journey.
Adjust Resistance by Fitness Level
To get the most out of your resistance bands, it’s important to match the tension level to your fitness experience and workout goals. Beginners should start with lighter bands made of softer band material for easier grip comfort and control. As you progress, increase tension by choosing thicker bands or ones with higher resistance levels. Consider these options:
- Use lighter bands for warm-ups or rehab exercises.
- Switch to medium resistance bands for general strength training.
- Opt for high-resistance bands when targeting advanced strength or power moves.
Matching the band’s material and grip comfort to your needs guarantees safety and effectiveness. Softer band material offers better grip comfort, especially during longer sessions, while increased resistance challenges your muscles appropriately without risking injury. Incorporating balanced designs ensures that your workout setup promotes harmony and reduces strain on your body. Additionally, understanding the resistance levels of different bands helps tailor workouts more precisely to your needs. Recognizing the importance of appropriate tension can prevent overexertion and enhance workout results.
Select Bands for Workout Goals
Selecting the right resistance band depends on your workout goals and experience level. For muscle building, choose thicker bands made from durable material with higher tension. If you’re focusing on flexibility or rehab, lighter, more elastic bands work best. Use color coding to quickly identify tension levels—red for light, blue for moderate, black for heavy.
| Goal | Recommended Band Material & Color |
|---|---|
| Strength | Thick, durable band (black) |
| Flexibility | Light, elastic band (red) |
| Rehabilitation | Medium tension, (blue) |
| Endurance | Multi-layered, heavy-duty material |
| Power Training | Extra thick, high-tension bands |
Common Mistakes When Choosing Resistance Bands and How to Avoid Them

One common mistake people make when picking resistance bands is focusing solely on their current fitness level without considering future progress. This can lead to choosing a band that’s either too easy or too difficult later on. To avoid this, pay attention to these factors:
- Band size – Smaller bands may offer less resistance, while larger ones provide more.
- Color coding – Use consistent color coding across brands to identify tension levels easily.
- Progression flexibility – Select a band that allows you to gradually increase resistance as you improve.
Tips for Adjusting Resistance Band Tension as You Progress

As you build strength and improve your fitness, adjusting the resistance band tension becomes essential to continue challenging your muscles. One effective way is to change your band grip—holding it higher or lower modifies the tension. Additionally, pay attention to the band’s color coding, which often indicates different resistance levels. As you progress, switch to a band with a different color to increase or decrease tension accordingly. You can also double up bands for added resistance or use a longer band for less tension. Regularly evaluate your performance; if an exercise becomes too easy, modify by changing your grip position or switching to a higher-resistance band. These simple adjustments ensure consistent progression without guesswork.
How to Choose the Best Resistance Bands for Your Budget and Goals

Choosing the right resistance bands depends on your budget and fitness goals. To make an informed decision, consider these factors:
- Band color coding – Different colors indicate varying resistance levels, helping you select the appropriate tension for your workouts.
- Material quality – Higher-quality bands last longer and provide consistent resistance, often costing a bit more but saving money in the long run.
- Resistance band storage – Proper storage keeps bands in good shape; look for bands that come with or fit into compact storage options.
If you’re on a budget, opt for basic bands with clear color coding for easy resistance identification. For greater goals, invest in durable, versatile bands, and store them properly to extend their lifespan.
Frequently Asked Questions
Can Resistance Bands Replace Free Weights Entirely?
Resistance bands can’t fully replace free weights, but they’re versatile tools for many workouts. You need to consider band durability to guarantee they withstand your routine, and tension calibration to match your strength level. While bands excel in mobility and targeting specific muscles, free weights often provide more consistent resistance for heavier lifting. Combining both gives you a comprehensive approach, but bands alone may not cover all strength-building needs.
How Long Should I Use Resistance Bands During Each Workout?
Imagine this: like a knight’s sword, your resistance band’s length influences your workout. Use bands for 15-30 minutes, adjusting tension progression as you grow stronger. Focus on quality reps, not just time. Shorter sessions with increased tension are better than long, unchallenging workouts. Listen to your body, and don’t rush. Consistency beats duration—aim for a balanced routine that keeps you motivated and progressing safely.
Are There Safety Concerns With High-Tension Resistance Bands?
Using high-tension resistance bands can pose safety concerns if you don’t follow proper band safety guidelines. You might risk the band snapping or slipping, which could cause injury. Always inspect your bands regularly for wear and tear, avoid overstretching, and confirm you use the right tension level for your strength. By paying attention to tension concerns and practicing good band safety, you protect yourself and get the most effective workout.
How Do I Store Resistance Bands to Maintain Their Tension?
You should store your resistance bands by keeping them in a cool, dry place, away from direct sunlight. Avoid stretching or hanging them for long periods, as this can affect tension maintenance. Instead, gently roll or fold the bands and place them in a storage bag or container. Proper band storage helps preserve their elasticity and tension, ensuring they stay effective and safe for your workouts over time.
Can Resistance Bands Help With Injury Rehabilitation?
Yes, resistance bands can help with injury rehabilitation. They provide controlled, elastic tension that allows you to strengthen muscles gently, reducing the risk of further injury. Using bands strategically supports injury prevention by improving flexibility and stability. Just make certain you choose the right tension levels for your recovery stage, and always follow your healthcare provider’s advice to avoid overexertion and promote safe, effective healing.
Conclusion
Choosing the right resistance band tension can boost your workout effectiveness and help prevent injuries. Did you know that using the correct tension level can improve strength gains by up to 30%? By evaluating your goals, testing bands properly, and adjusting as you progress, you ensure safe and efficient training. Stay mindful of common mistakes, and you’ll find the perfect tension for your fitness journey—making every workout count.