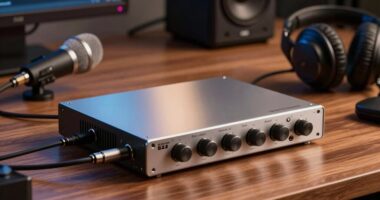
To improve your podcast sound, choose a microphone with a directional polar pattern like cardioid to focus on your voice and reject background noise. Proper placement—keeping the mic 6-12 inches from your mouth and away from reflective surfaces—reduces echo. Improving room acoustics with soundproofing and absorption materials can make a big difference. If you continue exploring, you’ll learn effective techniques to eliminate room echo and achieve professional-quality recordings.
Key Takeaways
- Choose a cardioid microphone to focus on the speaker’s voice and reject background noise effectively.
- Position the microphone close (6-12 inches) to the mouth to minimize room echo and improve sound clarity.
- Use acoustic treatments like foam panels and soundproof curtains to absorb reflections and reduce room echo.
- Keep the microphone away from reflective surfaces to prevent reverb and unwanted echo during recording.
- Experiment with microphone placement and room setup to optimize audio quality and minimize ambient noise.

FIFINE USB/XLR Dynamic Microphone for Podcast Recording, PC Computer Gaming Streaming Mic with RGB Light, Mute Button, Headphones Jack, Desktop Stand, Vocal Mic for Singing YouTube-AmpliGame AM8
[Natural Audio Clarity] Operated with frequency response of 50Hz-16KHz, the podcasting XLR mic delivers balanced audio range, likely…
As an affiliate, we earn on qualifying purchases.
As an affiliate, we earn on qualifying purchases.
What Are Microphone Polar Patterns and Why Do They Matter?

Have you ever wondered why some microphones pick up sound from all directions while others focus on specific areas? It all comes down to their polar patterns, which determine how they capture sound. Understanding these patterns helps with proper microphone calibration, ensuring you record clear audio without unwanted noise. For example, a cardioid pattern emphasizes sound directly in front of the mic, providing better sound isolation from background noise. Conversely, omnidirectional mics pick up sound equally from all directions, making them suitable for capturing ambient noise or group recordings. Knowing the polar pattern of your microphone allows you to position it correctly, reduce room echo, and improve overall audio quality. Additionally, European cloud innovation promotes the development of sustainable and secure cloud solutions, which can be integrated into modern recording setups for enhanced data management. Recognizing the polar pattern types enables sound engineers to select the right microphone for specific recording environments. Proper understanding of these patterns also assists in minimizing room echo, creating a cleaner and more professional sound environment. Being aware of polar pattern variations can help you adapt your recording technique to different acoustic spaces. Moreover, understanding the frequency response of your microphone can further optimize sound quality in various settings.

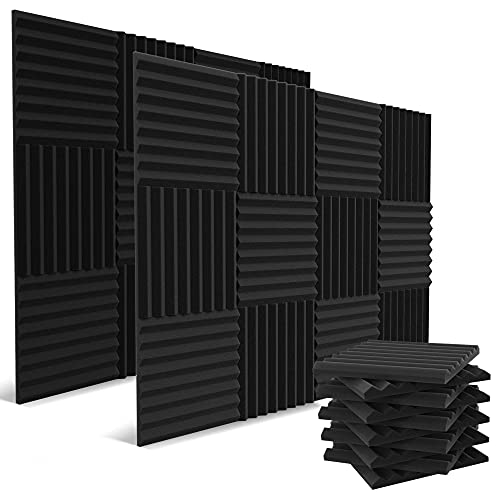
54 Pack Sound Proof Foam Panels |12"×12"×1" Quick-Recovery Soundproof Wall Panels | High Density Sound Dampening Panels for Home Studio |With Adhesive Stickers 270PCS
Superior Acoustic Treatment: These sound-absorbing foam panels effectively dampen echoes and reverberations for enhanced audio clarity and quality
As an affiliate, we earn on qualifying purchases.
As an affiliate, we earn on qualifying purchases.
Which Polar Pattern Is Best for Your Podcast Setup?

Choosing the right polar pattern for your podcast setup depends on your recording environment and the number of speakers involved. Your goal is to maximize audio quality while minimizing background noise and room echo. For solo recordings, a cardioid pattern is ideal, focusing on your voice and rejecting unwanted sounds. If you have multiple speakers, an omnidirectional or figure-eight pattern can capture everyone effectively. When selecting a polar pattern, consider microphone characteristics like sensitivity and rejection capabilities. Keep these key points in mind:
- Cardioid patterns are great for focused recordings
- Omnidirectional captures all directions, suited for group discussions
- Figure-eight patterns are useful for face-to-face interviews
- Rejection of ambient noise varies by pattern
- Your environment influences the best choice for clarity
- Understanding polar pattern characteristics helps you choose the most suitable microphone for your setup
Additionally, understanding the polar pattern’s rejection qualities can significantly improve your recording quality by minimizing unwanted sounds. Choosing the proper polar pattern ensures clearer audio and reduces room echo.

Aokeo Microphone Isolation Shield, Foldable Mic Shield with Triple Sound Insulation, Reflection Filter with 3/8" and 5/8" Mic Threaded Mount for Recording Studio, Podcasts, Singing, and Broadcasting
The Microphone Isolation Shield features a sound-proof foam front and a ventilated metal back panel to eliminate noise…
As an affiliate, we earn on qualifying purchases.
As an affiliate, we earn on qualifying purchases.
How to Choose the Right Microphone Pattern for Your Room

Your room’s acoustics play a big role in choosing the right microphone pattern, as some pick up more ambient sound than others. Understanding the different polar pattern types helps you select the best one for your space. Practical placement tips can further optimize your sound quality and reduce unwanted noise. Additionally, considering room acoustics is essential for selecting a microphone pattern that minimizes echo and background noise. Recognizing how sound absorption features in your space can also influence your choice of microphone pattern to achieve clearer recordings. Being aware of sound reflection can help you better understand how sound waves interact within your environment, leading to more informed microphone selection. Knowing how soundproofing techniques can improve your recording environment enables you to make smarter choices in mic placement and pattern selection. Incorporating room treatment strategies can further enhance your audio quality by controlling reflections and reverberations.
Room Acoustics Considerations
Room acoustics play a crucial role in selecting the right microphone pattern because different patterns respond uniquely to reflections and background noise. If your space has lots of echo, a directional pattern like cardioid helps focus on your voice while rejecting room sound. Using soundproof materials and acoustic panels can notably improve sound quality by reducing reflections. When choosing your pattern, consider:
- The amount of natural room echo
- Presence of soundproofing or acoustic treatments
- Proximity to reflective surfaces
- Background noise levels
- Room size and shape
Additionally, understanding the interaction of microphone patterns with room acoustics** can guide you toward the best choice for your specific environment. Properly managing these factors ensures your microphone captures clear, focused audio. While some rooms need more treatment, choosing the right pattern can mitigate many issues caused by room acoustics, making your recordings sound professional and polished. Recognizing how free floating setups interact with room acoustics can also influence your microphone selection and placement strategies. Being aware of room reflections can help you position your microphone more effectively to minimize unwanted sound interference. Furthermore, employing acoustic treatments tailored to your space can significantly enhance your sound quality by controlling reflections and echoes. Additionally, understanding sound absorption** principles can help you optimize your room setup for better audio clarity.
Polar Pattern Types Overview
Understanding the different polar pattern types is essential for selecting the right microphone for your recording environment. Microphone types vary based on their polar pattern functions, which determine how they pick up sound from different directions. Cardioid microphones capture sound primarily from the front, making them ideal for isolating vocals and reducing room noise. Omnidirectional mics pick up sound equally from all directions, useful if your room has good acoustics. Bidirectional or figure-eight patterns pick up sound from the front and back, suitable for duet recordings. Shotgun mics have highly focused polar patterns, ideal for distant or outdoor recordings. Knowing these microphone types helps you match the pattern to your room’s acoustics, ensuring clear sound and minimizing echoes. Additionally, understanding sound vibrations and their effects can further enhance your recording setup. Being aware of the polar pattern also helps in managing sound reflections and room echo, especially in less treated spaces. Considering room acoustics when choosing a microphone can significantly improve your overall recording quality and reduce unwanted reverberations. Recognizing the impact of sound reflections allows you to make better choices in microphone placement and room treatment.
Practical Placement Tips
Choosing the right microphone pattern depends on your recording environment and the sound you want to capture. Proper microphone positioning and speaker placement are essential for clear, professional audio. To optimize your setup, consider these tips:
- Place the microphone close to your mouth to reduce room echo.
- Use a directional pattern like cardioid to focus on your voice and reject background noise.
- Adjust the angle of the microphone to minimize plosive sounds.
- Keep the microphone away from reflective surfaces to prevent unwanted reverb.
- Experiment with speaker placement to find the balance between room ambiance and clarity.
- Be mindful of room acoustics, as they can significantly impact your recording quality. Additionally, understanding soundproofing techniques can help improve your recording environment by minimizing external noise and reverberation.
- Incorporating sound absorption materials into your space can further reduce echo and improve overall sound clarity.
- Proper microphone placement and environment control are crucial for achieving professional audio quality.
- Utilizing acoustic treatment can further enhance sound clarity by controlling reflections and standing waves within your space.
52 Pack Acoustic Panels 1 X 12 X 12 Inches – Acoustic Foam – High Density- Soundproof Studio Wedges – Charcoal
★ Professional Sound Absorbing Properties – Acoustic foams are installed to reduce noise pollution as they remove echoes…
As an affiliate, we earn on qualifying purchases.
As an affiliate, we earn on qualifying purchases.
Position Your Microphone for Clear, Professional Sound

To get professional-sounding recordings, you need to position your microphone correctly. Use proper placement techniques and consider your room’s acoustics to reduce echo and background noise. Creating an ideal recording environment will make your voice clear and engaging for listeners. Additionally, understanding polar patterns can help you choose the best microphone orientation for your recording space.
Microphone Placement Techniques
Have you ever wondered why some podcasts sound crisp and professional while others seem muffled or distant? The key lies in microphone placement techniques. Proper microphone positioning guarantees your voice is clear and minimizes unwanted sounds like echo. To optimize your setup:
- Keep the microphone close to your mouth, about 6-12 inches away
- Aim it directly at your mouth for consistent audio
- Use a pop filter to reduce plosive sounds
- Avoid placing the mic near reflective surfaces
- Maintain a consistent distance to prevent echo issues
Room Echo Reduction Tips
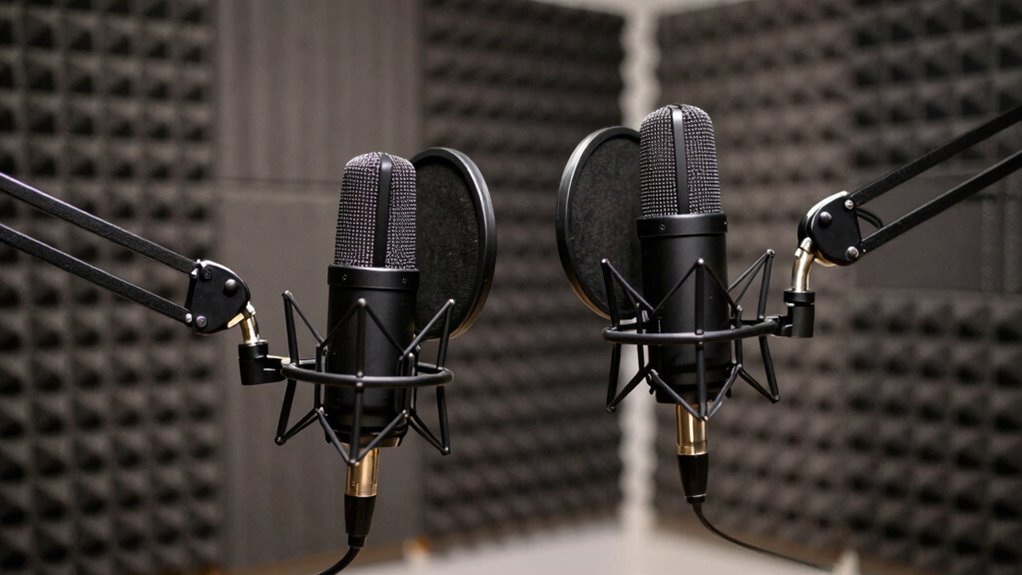
Ever notice how some recordings have a hollow or echoing sound, while others are crisp and clear? The key is proper room setup. Using soundproof curtains can markedly reduce echo by absorbing sound waves and preventing reflections. Position these curtains strategically near reflective surfaces or windows to dampen sound bouncing around your space. Additionally, foam panel placement is vital—place foam panels on walls where sound reflections are strongest. Focus on areas behind and around your microphone to minimize room reverberation. Keep your microphone away from hard surfaces and corners that amplify echo. These adjustments will help you achieve a cleaner, more professional sound, making your podcast sound polished and engaging. Small changes in placement can make a big difference in reducing room echo.
Optimal Recording Environment
Positioning your microphone correctly is essential for capturing clear, professional-quality sound. To achieve this, enhance your recording environment by applying effective soundproofing techniques and calibrating your microphone properly. Place your mic away from reflective surfaces and noise sources, and use foam panels or diffusers to reduce room echo. Consistent microphone calibration ensures your audio levels stay balanced, preventing distortion or unwanted noise. Consider the distance and angle of your mic to minimize ambient sounds and focus on your voice. Proper positioning combined with soundproofing techniques creates a clean recording space. Remember, small adjustments can dramatically improve sound clarity and professionalism. Keep these tips in mind to produce podcast recordings that sound polished and engaging.
- Use soundproofing techniques to minimize room noise
- Position your microphone away from reflective surfaces
- Calibrate your microphone regularly for ideal levels
- Keep a steady distance from your mic to avoid volume fluctuations
- Adjust your mic angle to reduce unwanted ambient sounds
How to Identify and Reduce Room Echo in Your Recordings

Room echo can markedly diminish the clarity of your recordings, making your voice sound distant or muddy. To identify echo issues, listen carefully to your recordings and note any lingering reverberations. If your voice sounds hollow or adds a sense of space, room echo is likely present. Reduce it by adding soundproof curtains, which absorb sound reflections, especially from windows and walls. Acoustic foam panels are also effective; place them on walls and ceilings to break up sound waves and minimize echo. Use a combination of these treatments while recording, and experiment to find the most effective placement. Properly identifying and reducing room echo ensures your voice remains clear and professional, giving your podcast a polished sound.
Easy Acoustic Treatments to Improve Your Recording Space

You can improve your recording space with simple acoustic treatments like DIY panels that absorb sound reflections. Moving your setup to a strategic room corner or away from hard surfaces also helps reduce echo. These easy adjustments make a noticeable difference in how your recordings sound.
DIY Acoustic Panels
Creating DIY acoustic panels is a cost-effective way to enhance your recording space without professional help. These panels absorb sound waves, reducing echo and improving audio clarity. To get started, gather materials like mineral wool, fabric, or foam, and build frames to hold them in place. Incorporate soundproof curtains behind the panels for added noise reduction. Position panels strategically around your room, especially near reflective surfaces, to optimize their effect. For deeper bass issues, consider a bass trap setup to target low-frequency reflections effectively. Remember, smaller, well-placed panels often outperform larger, poorly positioned ones. Consistent placement and experimenting with different configurations will help you achieve the best sound quality for your recordings.
Strategic Room Placement
Have you ever wondered why sound quality varies so much in different spaces? Your room’s layout and furnishings play a huge role. To improve your recording, start with strategic placement. Position your microphone away from reflective surfaces and corners where sound can bounce and cause echo. Use soundproof curtains to dampen external noise and reduce reflections from windows or walls. Placing foam bass traps in corners helps absorb low frequencies that can muddy your recordings. Keep your recording area clutter-free and experiment with microphone angles to find the clearest sound. Small adjustments, like moving furniture or adding acoustic treatments, make a big difference. Proper room placement creates a controlled environment, making your voice sound professional and reducing the need for extensive post-production.
Using Directional Microphones to Minimize Background Noise

Directional microphones are highly effective tools for reducing background noise during recordings or broadcasts. They focus on sound coming from a specific direction, enhancing noise isolation and background suppression. By targeting your voice and rejecting off-axis sounds, you can achieve clearer audio quality even in noisy environments.
Remember these key points:
- Choose microphones with cardioid or hypercardioid patterns for best noise rejection
- Position the mic close to your mouth to optimize noise isolation
- Avoid pointing the mic at potential noise sources
- Use windshields or pop filters to reduce ambient sounds
- Maintain consistent mic placement for reliable background suppression
Using the right directional microphone can considerably improve your podcast’s clarity, making background noise less noticeable and keeping your message front and center.
Simple Techniques to Deaden Room Reflections and Echo

Ever wondered how to make your recordings sound more professional and less echoey? You can achieve that by using simple techniques to deaden room reflections. Start with foam panel placement on walls where sound bounces most. Position panels to absorb early reflections and minimize echo. Adding soundproof curtains can also help, especially around windows and open areas, reducing ambient noise and reverberation. Here’s an imagery guide:
| Sound Absorption Options | Ideal Placement |
|---|---|
| Foam panels | Behind and beside your microphone |
| Soundproof curtains | Covering windows and open spaces |
| Carpets and rugs | On floors to absorb sound |
| Soft furniture | Filling empty spaces for echo control |
Combine these techniques for a cleaner, more controlled recording environment.
Troubleshooting Common Podcast Sound Issues
When recording your podcast, you might encounter common sound issues that can detract from the overall quality. To troubleshoot, start by checking your audio interface connections to guarantee clear signal transfer. Use a pop filter to minimize plosive sounds that can cause distortion. If your voice sounds muffled, adjust the microphone placement or gain settings. Background noise can be reduced by adding acoustic treatment or using noise suppression features. Finally, monitor your recordings with quality headphones to catch issues early. Remember these tips:
- Confirm proper microphone placement
- Use a pop filter to reduce plosives
- Check audio interface connections
- Adjust gain levels for clarity
- Minimize background noise sources
Addressing these issues promptly helps maintain professional sound quality and keeps your podcast engaging.
Final Tips for Achieving Studio-Quality Podcast Sound

To achieve studio-quality podcast sound, paying close attention to your recording environment and equipment setup is essential. Regular microphone maintenance guarantees your equipment stays in top condition, preventing unwanted noise or deterioration that can compromise sound quality. Invest in sound-treated spaces to reduce echo and background noise, enhancing clarity. Consistent audio quality also supports your podcast branding, making your show sound professional and credible. Use high-quality cables and proper mic placement to optimize sound capture. Test your setup before recordings to catch issues early. Remember, good sound design and attention to detail reflect your dedication to quality and help build a loyal audience. Implementing these tips will elevate your podcast’s sound to professional standards, making it stand out.
Frequently Asked Questions
How Do I Test My Microphone’s Polar Pattern in My Recording Space?
To test your microphone’s polar pattern, start by recording yourself speaking from different angles, considering your room acoustics. Change your microphone positioning to see which angles pick up the least echo and room noise. Listen carefully to each recording to identify the pattern that best isolates your voice. This helps you optimize your setup, reduce room echo, and guarantee clear, professional sound quality in your recordings.
Can I Change the Polar Pattern on a Microphone After Purchase?
You can’t usually change the polar pattern on a microphone after purchase unless it has adjustable polar patterns. These microphones are designed with built-in switches or controls for microphone customization, allowing you to switch between cardioid, omnidirectional, or figure-eight patterns. Check your mic’s specs before buying, and if it isn’t adjustable, you’ll need a different microphone for different recording needs.
Are Some Polar Patterns Better for Remote or Mobile Podcasting?
Yes, some polar patterns are better for remote or mobile podcasting. Cardioid microphones, with their focused pickup, reduce background noise, making them ideal for portable setups and mobile recording. Supercardioid and hypercardioid patterns offer even more directionality, helping you isolate your voice in noisy environments. Selecting the right polar pattern guarantees clear audio quality, so you can confidently record on the go without worrying about room echo or background disturbances.
How Does Microphone Placement Affect the Effectiveness of Different Polar Patterns?
Did you know proper microphone placement can improve sound quality by up to 50%? Your room acoustics and microphone positioning directly influence how effectively different polar patterns pick up your voice. Keep the mic close to your mouth for cardioid patterns to minimize room echo, and angle it slightly to avoid plosive sounds. Adjust placement based on your polar pattern to maximize clarity and reduce unwanted room noise.
What Are the Signs of a Microphone That’s Not Suited for My Room Acoustics?
You’ll notice a microphone that’s not suited for your room if you hear excessive room reflections or echo, which muddles your sound. It may also pick up too much background noise, making your voice less clear. If your recordings sound distant or overly reverberant despite proper placement, it’s a sign you need a microphone better suited to your acoustics. Switching to one with the right polar pattern can help reduce these issues.
Conclusion
Choosing the right microphone polar pattern and controlling room echo can elevate your podcast’s sound quality dramatically. Did you know that poor acoustics can reduce listener engagement by up to 50%? By understanding your setup and applying simple techniques, you can create a professional, studio-quality sound right at home. So, take control, experiment with your microphone placement, and watch your recordings sound clearer and more compelling to your audience.