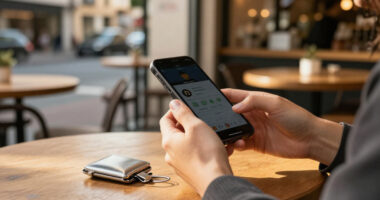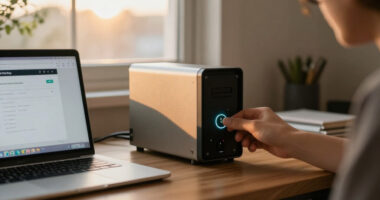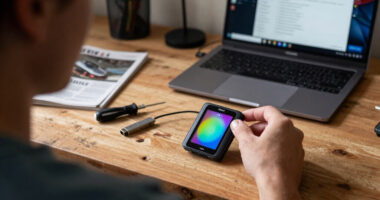

Set up a hardware wallet to keep your cryptocurrency signing keys under your control and away from an internet-connected computer or phone. This guide is for beginners who already know which cryptocurrency and wallet network they use. You will prepare the wallet, record its recovery phrase offline, receive a small test deposit, and verify a transaction on the device before approving it. Allow 45-90 minutes, plus time for any deposit confirmation required by your network.

Get hardware and tech essentials delivered free with Prime
- Fast, free delivery on millions of items
- Prime Video, Amazon Music and more included
- Member-only deals all year

Trezor Safe 7 Crypto Hardware Wallet with Bluetooth and Color Touchscreen
- ✔ Security: TROPIC01 chip and EAL6+ Secure Element
- ✔ Display: High-resolution color touchscreen
- ✔ Connectivity: Encrypted Bluetooth and USB-C

Tangem Crypto Wallet, 2-Pack
- ✔ Key security: EAL6+ chip; private keys generated and stored on-device
- ✔ Backup: Encrypted backup across two cards; optional seed phrase
- ✔ Connectivity: NFC; no USB or Bluetooth

KeepKey Hardware Wallet for Crypto and Bitcoin
- ✔ Brand: KeepKey
- ✔ Compatible devices: Linux, Mac, Windows
- ✔ Firmware: Open-source
A hardware wallet reduces some online risks, but it does not protect you from every scam or from losing your recovery phrase. Treat the phrase as the master backup to your wallet: anyone who obtains it may be able to take the funds. Never enter it into a website, chat, computer, or phone.
Difficulty: Beginner | Time: 45-90 minutes
What You’ll Need
Tools & Materials:
- A hardware wallet bought from the manufacturer or an authorized seller
- A computer or phone compatible with the wallet
- The manufacturer’s official wallet app or supported wallet software
- The wallet’s supplied recovery phrase cards or other offline recording material
- A small amount of cryptocurrency for a test deposit and transaction fee
Knowledge:
- The name of the cryptocurrency and the network you intend to use
- Basic ability to install software and follow prompts on a device
- Awareness that transaction fees and confirmation times vary by network
Set aside a private place where nobody can see or photograph your recovery phrase. Check the manufacturer’s official website for supported devices, the official software download, and setup instructions. If your device arrives with a recovery phrase already printed or written down, do not use it; a new device should generate its own phrase during setup. Never share your phrase or device PIN with anyone, including someone claiming to be support.
Trezor Safe 7 Crypto Hardware Wallet with Bluetooth and Color Touchscreen
Trezor Safe 7 is the most complete fit for buyers who want to review activity on the wallet itself while retaining a choice of wired or wireless access. Its color touchscreen gives us a dedicated place to inspect transaction information, rather than relying entirely on a phone or computer display. The listed combination of a TROPIC01 chip and EAL6+ Secure Element also sets it apart from KeepKey, whose supplied details emphasize open-source firmware but do not list a comparable chip configuration.Connectivity is another point of difference. We can use USB-C or encrypted Bluetooth across Android, iOS, and PC, whereas Tangem depends on an NFC-compatible phone and KeepKey uses Micro USB. That flexibility helps Safe 7 work across more setups, but wireless access and a rechargeable battery add components to consider when planning use. The IP54 rating covers dust and splashes, not full submersion, and wireless charging requires a compatible Qi2 charger. The listed case type is unknown, so buyers who care about the supplied protective case should check package details before choosing. Compared with Tangem’s highly portable cards, Safe 7 is a more feature-rich device; compared with KeepKey, it offers newer connectivity and a more prominent review interface.
Pros:
- Color touchscreen supports on-device review of transactions.
- TROPIC01 chip and EAL6+ Secure Element are listed in its security design.
- USB-C and encrypted Bluetooth support wired and wireless access.
- IP54-rated enclosure and LiFePO₄ battery are designed for everyday use.
Cons:
- Wireless charging requires a compatible Qi2 charger.
- IP54 protection covers dust and splashes, not submersion.
- The supplied case type is not specified.
Best for: Buyers who want a dedicated touchscreen for transaction review plus both USB-C and encrypted Bluetooth access.
Not ideal for: People who prefer a seedless card wallet, want to avoid battery-powered electronics, or need a device that can withstand immersion.
Bottom line: We recommend Safe 7 for buyers who want the strongest mix of transaction visibility and connection options in this lineup.
“We recommend Safe 7 for buyers who want the strongest mix of transaction visibility and connection options in this lineup.”
Tangem Crypto Wallet, 2-Pack
Tangem takes a different approach to crypto security: instead of a screen-equipped device, we use NFC wallet cards with private keys generated and stored in an EAL6+ chip. Its seedless setup option may appeal to buyers who would rather avoid writing down a seed phrase, and the supplied encrypted backup cards give recovery a physical-card route. That is a meaningful distinction from KeepKey, which includes a recovery sentence card, and from Safe 7, which centers access around a touchscreen device.The card format is easy to carry, and the stated IP69K waterproof and shockproof design is more rugged on paper than Safe 7’s splash resistance or KeepKey’s water-repellent description. Tangem also lists support across more than 90 blockchains, but broad asset support does not remove the need to confirm that our specific assets and transaction types are supported by the wallet’s software. This setup depends on a phone with NFC, so it is a poor fit for anyone seeking independent access without a compatible phone. The two backup cards should be stored separately to reduce the chance that one incident compromises both access and recovery. Compared with Safe 7, Tangem favors portability and a simpler physical form; compared with KeepKey, it trades screen-based confirmation for card-and-phone interaction.
Pros:
- Private keys are generated and stored in an EAL6+ chip.
- Seedless setup is available, with encrypted backup across two cards.
- Waterproof and shockproof design is specified as IP69K.
- NFC access and stated support for more than 90 blockchains suit a mobile workflow.
Cons:
- Requires a compatible phone with NFC to access the wallet.
- Backup cards need secure, separate storage for better resilience.
- No dedicated screen is listed for reviewing transaction details.
Best for: Phone-first buyers who want a compact NFC wallet, seedless setup as an option, and card-based recovery.
Not ideal for: People without an NFC-compatible phone, anyone who prefers to verify transactions on a dedicated wallet display, or buyers who do not want to manage multiple backup cards.
Bottom line: Tangem is our compact pick for phone-first users who value card-based access and recovery over a dedicated transaction display.
“Tangem is our compact pick for phone-first users who value card-based access and recovery over a dedicated transaction display.”
KeepKey Hardware Wallet for Crypto and Bitcoin
KeepKey is the straightforward choice for buyers who want keys held on a dedicated device and transactions confirmed on its screen. That screen creates a useful approval step: we can check displayed transaction details on the wallet before authorizing, rather than treating the connected computer as the only source of information. Its open-source firmware is another point of distinction from the supplied Tangem and Safe 7 descriptions, which focus more on chip security and connectivity.Its tradeoffs are practical. KeepKey uses Micro USB, so buyers with newer USB-C setups may need another cable or adapter, while Safe 7 offers USB-C and Tangem avoids a cable through NFC. The aluminum enclosure gives it a solid material choice, but the product details describe water protection only as water repellent; that is less specific than Tangem’s IP69K rating and does not establish immersion resistance. KeepKey’s supplied details list a recovery sentence card, but do not describe a multi-card encrypted backup method like Tangem’s. We should make sure our recovery plan is clear before relying on it. This model makes most sense when we prioritize a wired, screen-confirmed workflow and open-source firmware over modern connectivity or a pocket-sized card format.
Pros:
- Keys stay on the device, with transactions confirmed on its screen.
- Open-source firmware is a notable transparency feature in this lineup.
- Aluminum enclosure and a recovery sentence card are included.
- Compatible with Linux, Mac, and Windows.
Cons:
- Micro USB is less convenient for many current device setups than USB-C.
- Water resistance is described only as water repellent.
- Supplied details do not specify an encrypted multi-card backup system.
Best for: Buyers who want a dedicated transaction screen, open-source firmware, and a simple wired connection across Linux, Mac, or Windows.
Not ideal for: People who want USB-C, wireless or NFC access, detailed environmental protection ratings, or a card-sized wallet.
Bottom line: KeepKey is a reasonable wired screen option for buyers who value open-source firmware and can accept an older connector.
“KeepKey is a reasonable wired screen option for buyers who value open-source firmware and can accept an older connector.”
As an Amazon Associate we earn from qualifying purchases.
Before You Start
Confirm the wallet supports the exact asset and network you plan to use. A cryptocurrency may exist on multiple networks, and an address for one network may not be suitable for deposits on another. Use the manufacturer’s official site by typing its address yourself or using a trusted bookmark. Avoid sponsored search results, unsolicited links, and messages offering setup help.
Choose a recovery phrase storage plan before generating the wallet. Write the words in the order shown and store the record somewhere private and protected from fire, water, theft, and accidental disposal. Do not save it as a screenshot, note, cloud document, email, or password manager entry. If your device supports a passphrase feature, leave it off unless you understand that losing that passphrase can make the backup unusable.
Step-by-Step Instructions
Step 1: Inspect the wallet and confirm its source
Open the package and compare its contents with the manufacturer’s official setup guide. Check for signs that the package or device has been altered. Use the manufacturer’s instructions to confirm the device model and any authenticity checks it provides. Connect it only as directed by the manufacturer; do not follow instructions printed on a loose card that contains a recovery phrase.
Tip: A seal alone does not prove that a wallet is safe. Buy from the manufacturer or an authorized seller, and contact the manufacturer through its official website if the package or device seems suspicious.
Check: The device matches the expected model, the package has no unexplained changes, and the official instructions confirm how to begin setup.
Step 2: Install the official wallet software
Find the manufacturer’s official website and download the wallet app for your computer or phone. Check that the page names your device model and operating system. Install the app, open it, and follow its prompts to connect or pair the hardware wallet. If the app asks for a recovery phrase before the device has generated one, stop and verify that you downloaded the official software.
Tip: Do not search for a wallet app by name and choose the first result without checking the publisher and official site. Fake apps can imitate real wallet software.
Check: The official app recognizes the hardware wallet and displays the setup choices described in the manufacturer’s guide.
Step 3: Create a new wallet on the device
Select the option to create a new wallet on the hardware device. Follow the prompts on the device screen, not only the computer or phone screen. Set a PIN if the device offers one, and choose a code that others cannot easily guess. Do not use a PIN supplied by another person or written in the packaging. Keep the PIN private; it protects access to the device but does not replace the recovery phrase.
Tip: The exact buttons and menus differ by model. Use the official instructions for your device instead of adapting steps from a video made for another wallet.
Check: The device reports that a new wallet was created, and it prompts you to record a recovery phrase or complete another manufacturer-documented backup step.
Step 4: Record the recovery phrase offline
Write each recovery word on the supplied card or another durable offline medium, in the exact order shown on the device. Check spelling and numbering as you go. Keep the phrase out of view of cameras and other people. Do not type it into the computer, phone, app, website, or a message. Put the written backup in a private, secure location after you finish checking it.
Tip: Do not store the phrase beside the device or label it as a cryptocurrency backup. Consider a second secure copy only if you can protect it from theft and keep both copies accurate.
Check: You have an offline copy with every word in the correct order, and no digital photo, message, or file containing the phrase.
Step 5: Complete the wallet’s backup check
Use the device’s built-in recovery phrase check, if offered. Select or enter the requested words on the hardware wallet itself, following its prompts. If the device asks you to verify words through the computer or phone, stop and check the manufacturer’s instructions before continuing. Correct any copying error by referring to the phrase displayed during setup, while the device remains in your possession.
Tip: The recovery phrase is sensitive even during verification. Keep the screen and your written record private, and do not let anyone watch you enter or select the words.
Check: The device accepts the backup check, or the official instructions confirm that the wallet has completed its documented backup procedure.
Step 6: Add the asset and confirm its network
In the official app, add or open the account for the cryptocurrency you plan to use. Select the exact network that the sender or exchange will use. Compare the network label in the wallet with the network label on the sending service before copying a receive address. If either side uses unclear or different network names, pause and consult the official wallet and service documentation.
Tip: An address can look valid while belonging to a different network. A wrong network choice may make a deposit difficult or impossible to recover.
Check: The app displays the intended asset and network, and you can explain which network a sender must select.
Step 7: Receive and verify a small test deposit
Choose Receive in the wallet app and display the deposit address. Confirm the address on the hardware wallet screen if the device supports address verification. Compare the full address on the device with the one in the app; do not rely only on the first and last characters. Send a small amount from your exchange or another wallet, using the confirmed network. Wait for the confirmation count or status required by that network and service.
Tip: Check the withdrawal fee and any minimum deposit before sending. Keep enough funds available for fees, and do not send a large balance until the test deposit arrives at the intended account.
Check: The wallet app shows the test amount under the expected asset and network after the transaction receives the required confirmations.
Step 8: Verify and sign a small outgoing transaction
Prepare a small test transfer to an address you control. Check the destination address, asset, network, amount, and fee in the app. Read the corresponding details on the hardware wallet screen before approving; the device display is the final check for what you are signing. Reject the transaction if any detail is missing or differs from your intended transfer. Approve it using the device controls only after every visible detail matches.
Tip: Transaction approvals can be difficult or impossible to reverse. Never approve a prompt just because a website or caller says it is required to unlock funds, validate an account, or claim a reward.
Check: The device shows the intended transaction details before signing, and the recipient wallet shows the small test transfer after network confirmation.
Step 9: Store the backup and adopt a signing routine
Return the recovery phrase to its secure offline location, and store the hardware wallet separately if practical. Record where you have stored each item without writing down the phrase itself. Keep the device firmware and wallet software current by following the manufacturer’s official update instructions. Before future transfers, check the recipient, network, amount, and fee on the hardware wallet screen.
Tip: If you move the backup, check that the record remains legible and complete. Do not discard an old copy until you have confirmed the replacement is accurate and securely stored.
Check: You know where the device and offline backup are kept, and you can describe the checks you will perform before signing a transfer.
Common Mistakes to Avoid
- Entering the recovery phrase into an app, website, or support chat. — Enter or select recovery words only on the hardware wallet itself when its official setup instructions require it. Treat any request to submit the phrase elsewhere as a reason to stop.
- Sending funds over a network that does not match the wallet account. — Check the asset and network at both ends before sending, and complete a small test deposit first.
- Trusting the address shown only on a computer or phone. — Verify the full address on the hardware wallet screen before using it, when the device offers this feature.
- Approving a transaction without reading the device display. — Check the destination, amount, asset, and fee on the device before signing. Reject prompts that do not match your plan.
Troubleshooting
Problem: The official app does not recognize the device.
Solution: Reconnect the device using the supplied cable or the manufacturer’s specified connection method. Check compatibility, unlock the device, and install any required official driver or app update. Try another supported cable or port. Use the manufacturer’s support site if the device remains unrecognized; never provide your recovery phrase to support.
Problem: The wallet app shows a different address from the hardware wallet.
Solution: Do not use the address or approve a transaction. Disconnect and reopen the official app, then verify the account and network. Check the address again on the device. If it still differs, stop and contact the manufacturer through its official support channel.
Problem: The test deposit has not appeared.
Solution: Check the sending service’s withdrawal status and transaction ID. Use the relevant network’s official or well-known block explorer to check whether the transaction is pending or confirmed. Confirm the destination address and network. Allow for the network’s confirmation time; contact the sending service if it has not broadcast the transfer.
Problem: The recovery phrase check fails.
Solution: Pause before resetting or discarding anything. Compare the written words, spelling, and order with the phrase generated during setup, using the device’s documented verification method. If the wallet is already initialized, consult the manufacturer’s official recovery instructions before changing it. Never upload the phrase to a checker website.
What Success Looks Like
Your wallet is ready when the official app recognizes the device, the device has generated a recovery phrase that you recorded and checked offline, and the app displays the intended asset and network. A small test deposit should appear in the correct account after the required confirmations. For the outgoing test, the hardware wallet should show the details you intend to approve, and the recipient account should receive the transfer after confirmation. You should know where your device and backup are stored, and you should never need to type your recovery phrase into a connected computer or phone.
Next Steps
Keep the wallet, PIN, and backup private. Check the manufacturer’s official site for security notices and follow its documented firmware update process. Before moving a larger balance, confirm that you can access the correct account and that your backup remains readable. For larger holdings, consider whether your storage plan needs stronger physical protection or a separate backup location, while accounting for the risk of unauthorized access to each copy. If the device is lost, damaged, or compromised, use the manufacturer’s official instructions to recover the wallet on a trusted compatible device. If you think someone has seen your recovery phrase, treat the wallet as exposed and move funds to a newly generated wallet using a trusted device and verified addresses.
Frequently Asked Questions
Does a hardware wallet keep cryptocurrency inside the device?
No. Cryptocurrency balances are recorded on their networks. The hardware wallet protects the keys used to authorize transactions, while the wallet app displays account information and helps prepare transactions.
Can I recover my funds if the hardware wallet breaks?
Usually, a compatible wallet can restore access using the recovery phrase generated by the original device. Follow the manufacturer’s official recovery steps, and make sure the recovery words and their order were recorded correctly. A PIN by itself cannot restore the wallet.
Should I type my recovery phrase into a computer to restore a wallet?
Use the recovery method documented by the device manufacturer. Many hardware wallets let you enter words on the device itself. Avoid typing the phrase into a computer, phone, website, or support chat, because connected devices and online services can expose it.
Why should I make a small test transfer first?
A test transfer checks that you selected the intended asset, network, and address before you send a larger amount. It also gives you a chance to see how the app reports confirmations and fees on that network.
What should I do if someone asks for my recovery phrase?
Do not share it. Close the message or call, and contact the wallet maker through its official website if you need help. If you already exposed the phrase, use a trusted device to create a new wallet and move funds to it after checking every destination address and transaction on the hardware screen.