
To make movies look sharper with your portable projector, start by properly calibrating your screen and projector settings for focus, brightness, and contrast. Use a smooth, clean surface and keep your lens clean for clear images. Guarantee your device connects with high-quality cables and supports high-resolution output. Properly positioning the projector at the right throw distance and avoiding ambient light also boost sharpness. Keep these tips in mind, and you’ll discover more ways to enhance your viewing experience.
Key Takeaways
- Use a clean, smooth, and properly aligned screen surface to enhance image clarity and sharpness.
- Perform thorough screen calibration and focus adjustments regularly to maintain crisp visuals.
- Keep the projector lens clean and free of dust to prevent image distortion and blurriness.
- Control ambient lighting by dimming lights or using blackout curtains to reduce glare and reflections.
- Select a high-brightness portable projector (at least 300 lumens) suited for your environment for vivid, sharp images.

Mdbebbron 120 inch Projector Screen 16:9 Foldable Anti-Crease Portable Projector Movies Screens for Home Theater Outdoor Indoor Support Double Sided Projection
CONVENIENT TO STORAGE AND CARRY : Compact one-piece,lightweight and folding design. You can fold the projector screen in…
As an affiliate, we earn on qualifying purchases.
As an affiliate, we earn on qualifying purchases.
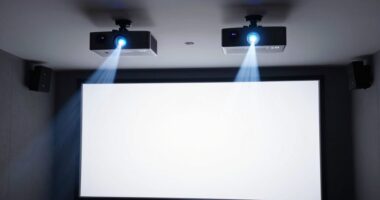
Why Image Clarity Matters When Using Portable Projectors
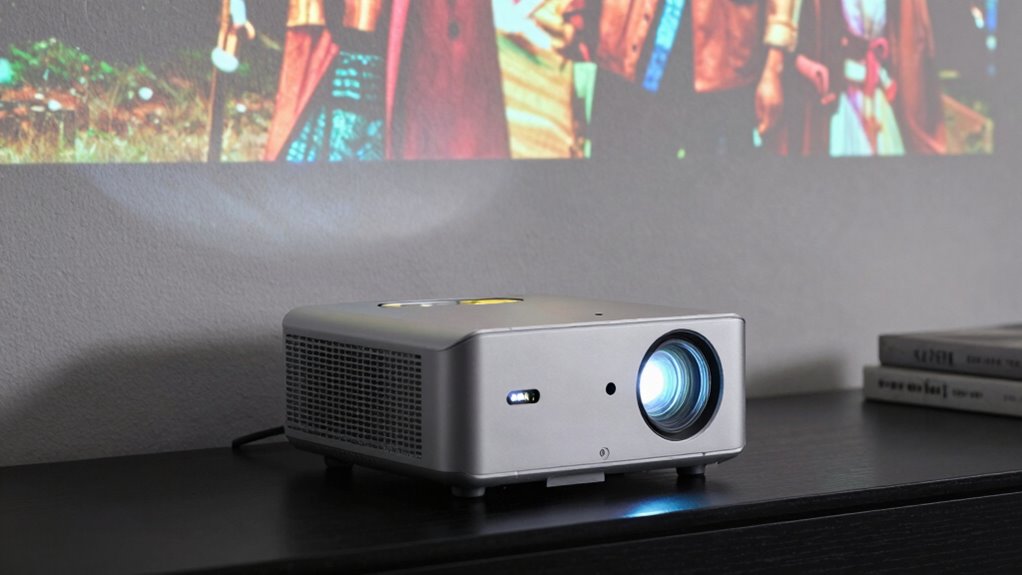
Image clarity is essential when using portable projectors because it directly affects how well your audience can see and understand the content. Proper screen calibration ensures the image is sharp, colors are accurate, and details are clear, making your presentations more engaging. If the image isn’t calibrated correctly, viewers might struggle to read text or see visuals clearly. Sound synchronization also plays a role; when audio and visuals aren’t aligned, it can distract your audience and diminish the overall experience. Guaranteeing both the image is crisp through calibration and that sound is synchronized creates a seamless viewing experience. When these elements are optimized, your portable projector delivers high-quality images that captivate and communicate effectively. Incorporating innovative European cloud solutions can further enhance your device’s performance and reliability, especially when managing advanced calibration tools remotely.

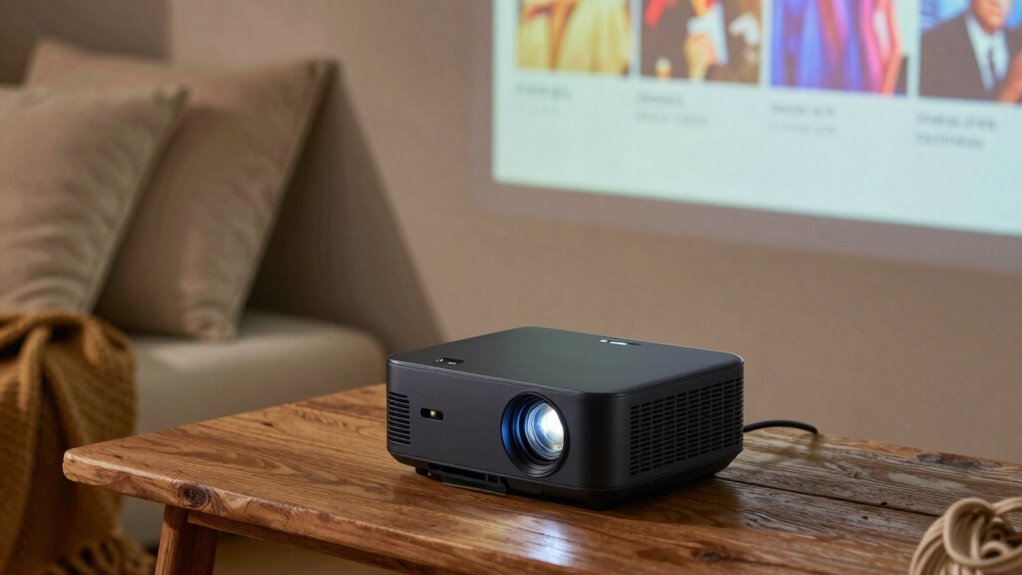
Epson EpiqVision Flex CO-FH02 Full HD 1080p Smart Streaming Portable Projector 3-Chip 3LCD, 3000 Lumen Color/White Brightness, Android TV, Bluetooth, 5W Speaker, Home Entertainment
Display Stunning Images up to 300" — Full HD 1080p picture four times larger than a 75" flat…
As an affiliate, we earn on qualifying purchases.
As an affiliate, we earn on qualifying purchases.
Key Features That Make Your Portable Projector’s Image Sharper

To guarantee your portable projector delivers a sharper, clearer picture, focus on key features that enhance image quality. Proper screen calibration ensures your projector displays images accurately, reducing distortions and blurriness. Additionally, audio synchronization prevents lag between sound and picture, making scenes more immersive and clearer. Look for projectors with auto-calibration capabilities to simplify setup. Confirm they support seamless audio syncing to avoid distractions. The table below highlights essential features to improve sharpness:
| Feature | Benefit | How It Helps |
|---|---|---|
| Screen Calibration | Accurate image display | Reduces distortion and blurriness |
| Audio Synchronization | Syncs sound with visuals | Keeps scenes sharp and immersive |
| Resolution | Higher pixel count | Produces clearer, sharper images |
Resolution is especially important for achieving high-definition clarity in various viewing environments, and understanding image sharpness can help you select the best equipment for your needs.
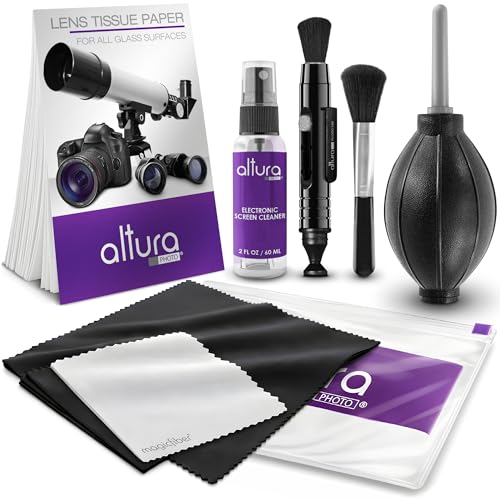
Altura Photo Camera Cleaning Kit – Lens Cleaner Spray, Brush, Pen, Blower, Microfiber Cleaning Cloths, Tissue Wipes for Canon Nikon Sony Fuji Olympus Pentax Sigma Tamron DSLR & Mirrorless Cameras
COMPLETE CAMERA CLEANING KIT: Our camera lens cleaning kit includes an alcohol & ammonia-free lens cleaner spray, cleaning…
As an affiliate, we earn on qualifying purchases.
As an affiliate, we earn on qualifying purchases.
How Brightness and Contrast Affect Picture Quality

Your projector’s brightness levels determine how clear the image appears, especially in well-lit rooms. The contrast ratio affects how vibrant and detailed the colors look, making the picture pop. Understanding these factors helps you choose a portable projector that delivers sharp, vivid images in any setting. For optimal performance, consider selecting a model with a high brightness rating and a strong contrast ratio to ensure clarity and color vibrancy in various environments. Additionally, maintaining your projector with proper air purifier maintenance can help prevent dust buildup that may affect image quality over time. Regular cleaning of your projector’s ventilation system helps preserve optimal body airflow, which can indirectly impact its performance and longevity. Incorporating proper filter care into your maintenance routine ensures the internal components stay clean, ultimately supporting consistent picture quality. Being aware of image quality factors can help you troubleshoot issues and select the best projector for your needs.
Brightness Levels and Clarity
Brightness levels and contrast are crucial factors that directly impact the clarity and overall quality of your projected images. To get the best picture, focus on proper screen calibration, which ensures your projector displays accurate brightness. In well-lit environments, higher brightness settings help keep images sharp and visible. Conversely, in darker rooms, you can lower brightness without sacrificing clarity, reducing eye strain and improving contrast. Keep in mind that if ambient lighting is too intense, even high brightness levels won’t guarantee clear images. Adjusting brightness appropriately based on your surroundings ensures your projector delivers crisp, vibrant visuals. Additionally, detecting passive voice can help improve your writing clarity and engagement. By fine-tuning these settings, you’ll enjoy sharper images with better detail, making your movie or presentation more engaging and immersive. Proper screen calibration is essential for optimizing picture quality and ensuring your images look their best regardless of the environment.
Contrast Ratio and Color Depth
Have you ever noticed how some images look vibrant and detailed while others seem dull or washed out? That’s often due to contrast ratio and color depth. A high contrast ratio creates richer blacks and brighter whites, making images pop, especially in ambient lighting. Color depth determines how many shades per pixel are displayed, adding realism and detail. When your projector has good contrast and color depth, you’ll see sharper images with better separation of elements. Keep in mind, ambient lighting can diminish perceived contrast, so choose a projector suited for your environment. Additionally, speaker quality doesn’t impact image quality but enhances your overall viewing experience. Brightness levels can also influence how well images appear in different lighting conditions. Use this table to compare key features:
| Feature | Impact |
|---|---|
| Contrast Ratio | Enhances blacks and whites for vivid images |
| Color Depth | Adds detail and realism to colors |
| Ambient Lighting | Can wash out contrast and reduce clarity |
| Speaker Quality | Improves audio but not picture quality |
| Usage Environment | Affects how contrast and color are perceived |
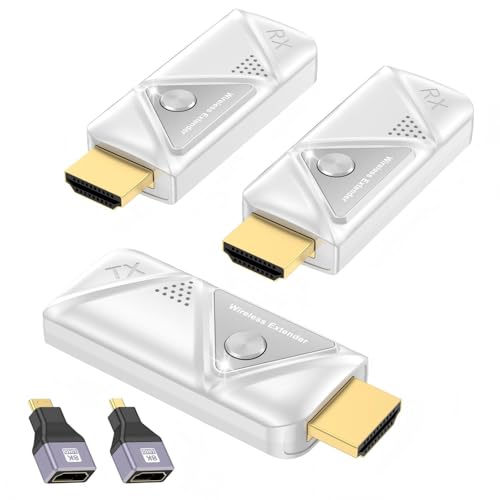
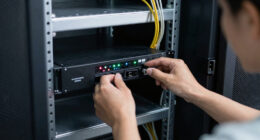
Wireless HDMI Transmitter and 2 Receivers, HDMI Wireless Dual Display Extender Kit Sync to 2 Screens, 5G/328FT/1080P Plug & Play for Simultaneous Audio/Video on TVs/Projectors/Monitors
【One-to-Two Wireless HDMI Solution】Say goodbye to tangled cables and embrace the freedom of wireless connectivity with our cutting-edge…
As an affiliate, we earn on qualifying purchases.
As an affiliate, we earn on qualifying purchases.
Choosing the Right Resolution for a Crisp, Clear Image
Choosing the right resolution is essential for guaranteeing your portable projector delivers a sharp, clear image. Start by considering your screen calibration to optimize picture quality, adjusting settings for the best sharpness and detail. Keep ambient lighting in mind—bright rooms may require higher resolutions to maintain clarity and prevent images from appearing washed out. A resolution of at least 1080p typically provides crisp images for most setups, but if you want even sharper detail, go for 4K. Remember, higher resolution content looks better on larger screens, so choose a resolution that matches your screen size and viewing environment. Proper calibration and suitable resolution ensure your movies look sharp and vibrant, no matter where you’re watching.
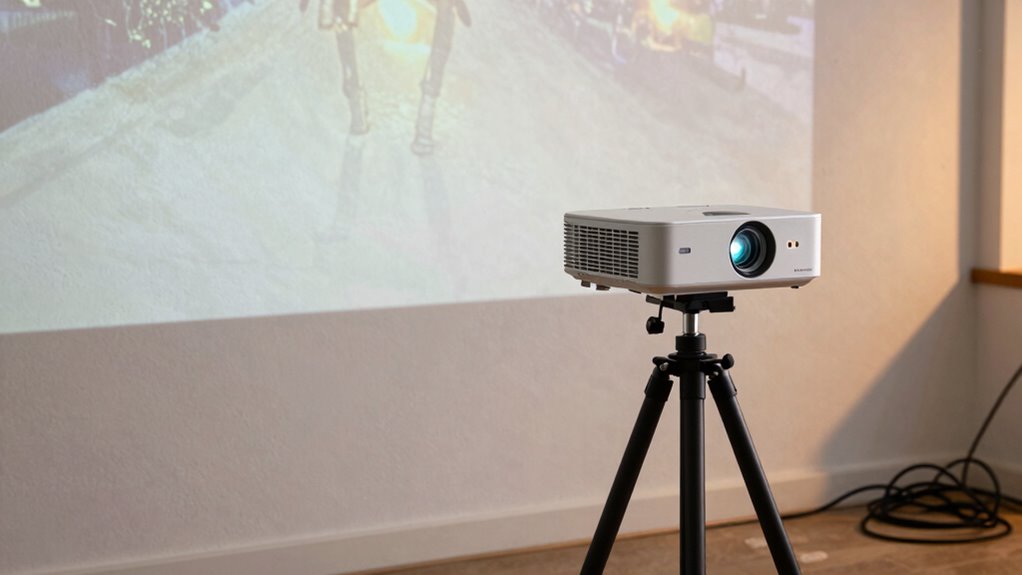
How Screen Size and Throw Distance Impact Image Sharpness
When selecting the right screen size and throw distance, it’s important to understand how these factors influence your image sharpness. A larger screen size can make details harder to see if your projector isn’t positioned correctly, causing blurriness. Similarly, throw distance—the space between your projector and screen—affects focus and clarity. To optimize sharpness, consider these key points:
- Choose an appropriate screen size for your space to prevent pixelation or distortion.
- Maintain the ideal throw distance specified by your projector to ensure a crisp image.
- Adjust zoom and focus settings to fine-tune sharpness based on your screen size and distance.
Getting these right guarantees a sharper, clearer picture every time.
Tips to Minimize Screen Blur and Achieve Perfect Focus
Achieving a sharp, clear image requires careful attention to focus adjustments and screen setup. Begin by performing a thorough screen calibration, ensuring the projector’s lens is clean and properly aligned. Adjust the focus ring slowly until the image appears crisp and free of blurriness. Keep in mind that ambient lighting impacts perceived sharpness; dim the room or use blackout curtains to reduce glare and reflections, which can cause the image to seem blurry. Make small focus tweaks while observing the picture to find the perfect setting. For ideal results, periodically recheck focus during your viewing session, especially if the projector or screen shifts slightly. Proper calibration and controlling ambient lighting are key to minimizing blur and achieving a stunning, sharp movie display. Additionally, understanding wiring basics can help ensure your projector setup is secure and optimally configured for the best image quality. Being aware of proper setup techniques can further enhance focus stability and overall picture clarity during extended viewing. Also, regularly inspecting your connection cables and connectors can prevent signal issues that might contribute to image softness.
Connecting Your Devices for the Best Image Quality
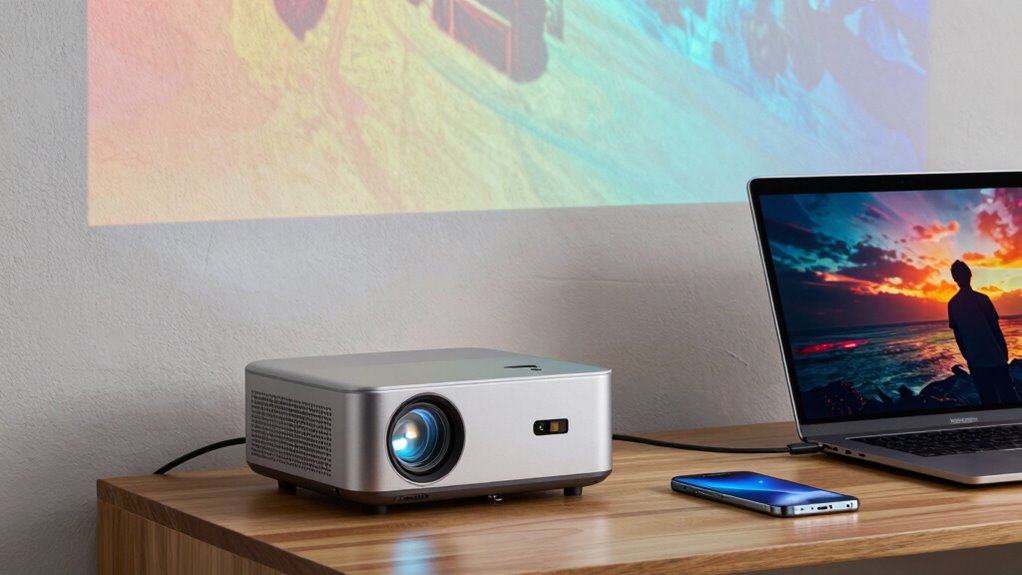
To get the best image quality, you need to connect your devices properly. Choosing compatible options and the right connection method can make a big difference. Keep signal quality in mind to guarantee a crisp, clear picture every time. Ensuring your projector’s smart-home integrations are properly configured can also enhance your overall viewing experience. Additionally, selecting connectivity options that support high-bandwidth signals can help maintain optimal image clarity. Being mindful of cable management techniques can also prevent signal interference and improve setup efficiency. Incorporating connected home fitness concepts can further streamline your entertainment setup for a more integrated experience. Understanding the importance of sound design can also elevate your movie experience by ensuring audio complements the sharp visuals.
Compatible Device Options
Looking for the best image quality when connecting your device to a portable projector? Ensuring device compatibility is key. Here are three top options to contemplate:
- Laptops and PCs: Most modern laptops support HDMI or USB-C, making them easy to connect with compatible cables and adapters. It’s also important to consider wave and wind compatibility, especially for outdoor setups or environments with potential interference. Additionally, verifying your device’s connection standards can help ensure seamless integration with your projector.
- Smartphones and Tablets: Compatibility varies; check for support of MHL, SlimPort, or wireless options like Miracast or AirPlay.
- Media Devices: Streaming sticks like Chromecast or Roku often come with built-in compatibility, plus accessory options like HDMI extenders can enhance connectivity.
- For example, understanding your device’s ethnicity can help determine the best connection method, especially for devices of mixed heritage or unique specifications.
Optimal Connection Methods
Connecting your devices to a portable projector in the best possible way guarantees sharp, vibrant images. Use quality cables like HDMI or DisplayPort for a reliable connection, which minimizes signal loss and guarantees ideal image clarity. Proper cable management keeps cords organized and prevents accidental disconnections or damage, helping maintain consistent picture quality. Avoid tangled or cluttered cables that could interfere with setup or cause unintended disruptions. Additionally, consider ambient lighting; dimming lights or controlling reflections enhances the projector’s image sharpness. Keep the projection area dark or subdued to maximize contrast and clarity. By focusing on secure, high-quality connections and managing ambient lighting, you’ll guarantee your image remains crisp, bright, and immersive every time you watch.
Signal Quality Tips
Ensuring your device connections deliver the highest image quality starts with selecting the right cables and settings. To optimize signal quality, consider these tips:
- Use high-speed HDMI cables to guarantee sharp, clear images, especially when streaming high-resolution content.
- Opt for wired connections over wireless connectivity whenever possible, as they provide more stable signals and reduce lag.
- Adjust your projector’s settings to minimize ambient lighting interference—dim lights or block windows—so the image appears sharper and more vibrant.
While wireless connectivity offers convenience, it can sometimes introduce signal degradation, especially in bright environments. Keeping connections solid and controlling ambient lighting will make your movies look crisper and more immersive.
Common Setup Mistakes That Can Make Movies Look Blurry
Have you ever noticed your movie looks blurry even though your projector seems properly set up? One common mistake is neglecting proper screen calibration. If your projector isn’t adjusted correctly, images can appear fuzzy or distorted. Make sure to align the projector’s focus and keystone settings precisely. Additionally, ambient lighting plays a big role; too much light can wash out the picture, making it appear less sharp. Avoid placing the projector in bright or unevenly lit rooms, and use curtains or dimmer lights to improve clarity. Also, ensure the screen surface is clean and smooth. Ignoring these setup details can considerably reduce image sharpness, so double-check your calibration and lighting conditions to get the clearest, most vibrant movie experience. Proper screen calibration and lighting adjustments can significantly enhance your viewing quality. Regularly maintaining your projector can also prevent image quality issues and keep your setup performing at its best. For optimal results, consider using a high-quality screen surface that reflects light evenly and enhances image clarity. Keep in mind that filtering and pump protection for your projector’s components can help prevent dust and debris from affecting image quality over time.
Top Portable Projectors for Sharp, Vivid Images

When choosing a portable projector, brightness levels are key to bright, clear images even in well-lit rooms. Resolution quality guarantees your visuals stay sharp and detailed, making every scene pop. Don’t forget, portability and ease of use help you enjoy impressive visuals wherever you go.
Brightness Levels Matter
Brightness levels are essential when choosing a portable projector because they directly impact how clear and vivid your images appear, especially in well-lit environments. Higher brightness ensures your screen calibration looks sharp and colors stay vibrant, even with ambient lighting present. If the brightness is too low, images become washed out and difficult to see. To optimize performance:
- Check the lumens rating—aim for at least 300 lumens for indoor use in moderate lighting.
- Consider the projector’s ability to handle ambient lighting without washing out the image.
- Verify if the projector offers adjustable brightness settings for fine-tuning based on your environment.
These features help you achieve sharper, more vivid images, making your movie experience truly immersive regardless of lighting conditions.
Resolution Quality Counts
High resolution is essential for guaranteeing your images are crisp and detailed, especially on a portable projector. To achieve this, look for models with good resolution optimization, which enhances image clarity without sacrificing performance. Higher resolution means increased pixel density, so your movies and presentations appear sharper and more vivid. A projector with at least 1080p resolution is ideal for clear, immersive viewing, but some premium options offer 4K for even more detail. Keep in mind that resolution quality directly impacts how sharp and lifelike your images look, making your viewing experience more enjoyable. Investing in a portable projector with strong resolution capabilities ensures you get the best possible image quality, whether for movies, gaming, or presentations.
Portability and Ease
Choosing a portable projector means prioritizing both image quality and convenience. To make your experience seamless, focus on features that enhance portability and ease of use.
- Battery life – Look for projectors with long-lasting batteries so you can enjoy hours of viewing without interruptions.
- Portability features – Compact, lightweight design with easy-to-carry handles or cases makes setup quick and effortless.
- Simple controls – User-friendly interfaces and quick connectivity options save time and frustration during setup.
These features ensure you can set up your projector anywhere, whether indoors or outdoors, without hassle. Prioritizing battery life and portability features guarantees a sharp, vivid image on the go, making your movie nights smooth and enjoyable.
Easy Tricks to Boost Image Sharpness During Movie Night

To improve the sharpness of your projected image during movie night, start by adjusting your projector’s focus carefully. Next, perform a quick screen calibration to ensure colors and geometry are aligned. Regular lens cleaning also helps, removing dust or smudges that can blur the picture. Here’s a simple table to guide you:
| Step | Action | Result |
|---|---|---|
| Focus Adjustment | Turn the focus ring until clear | Sharp, crisp image |
| Screen Calibration | Use on-screen tools or settings | Accurate colors and shape |
| Lens Cleaning | Gently wipe with a microfiber cloth | Clearer image, better sharpness |
Following these tricks ensures your movie nights are sharp and enjoyable.
Frequently Asked Questions
How Does Ambient Light Affect Portable Projector Image Quality?
Ambient light considerably impacts your portable projector’s image quality by reducing contrast and making the picture appear washed out. To improve clarity, you should increase the screen brightness or use a brighter projector. Dimming or controlling ambient light helps your images stay sharp and vibrant, ensuring you get the best viewing experience possible. Keep the environment as dark as possible for ideal picture quality and sharper movie visuals.
Can Screen Material Improve the Sharpness of Projected Images?
Yes, choosing the right screen material can improve the sharpness of your projected images. A high-quality, matte, or specialized screen reduces glare and enhances contrast, making images appear clearer and more detailed. You should select a screen designed for your projector type to maximize image sharpness. Properly tensioned and clean screens also ensure the projected image stays sharp, providing a better viewing experience overall.
What Role Does Lens Quality Play in Image Clarity?
Your lens quality is the key to crystal-clear images; it’s the heart of sharp visuals. High-quality lenses, crafted with precise lens manufacturing and enhanced with optical coatings, reduce distortions and glare. These coatings improve light transmission, ensuring brighter, sharper images. When you invest in a projector with superior lens quality, you’re giving your movies a boost—like sharpening a picture with a fine-tooth comb—making every detail pop with stunning clarity.
Are There Specific Settings to Enhance Sharpness on Portable Projectors?
Yes, you can enhance sharpness on portable projectors by adjusting resolution settings and focus. Start by selecting the highest resolution your projector supports to guarantee a clearer image. Then, use focus adjustments to fine-tune the picture for maximum clarity. Make small tweaks until the image appears crisp and sharp. These simple steps considerably improve your viewing experience, making movies look sharper and more vibrant.
How Does Projector Placement Influence Image Distortion and Sharpness?
Your projector placement directly affects image distortion and sharpness. Keep it aligned with the screen, and use keystone correction to fix trapezoidal distortion. Adjust the focal length to guarantee the image isn’t blurry or stretched. Position the projector at the ideal distance for clear, sharp visuals, avoiding angles that cause distortion. Proper placement maximizes clarity and minimizes image issues, giving you a better viewing experience.
Conclusion
A sharp picture transforms your movie night from ordinary to extraordinary. While a portable projector offers convenience, neglecting proper setup can blur the experience. Clarity isn’t just about specs; it’s about how you arrange your space and connect your devices. So, prioritize image quality over convenience. Because in the end, a crisp, vivid picture isn’t just seen — it’s felt, making every scene more immersive and memorable.